
📈 Curve data – Continuous Measurements
Albert Data Templates · Curve data
Use curve data when a single “average result per sample” is not enough – for example battery charge/discharge curves, impedance spectra, rheology sweeps, DMA curves or other high-frequency measurements exported as CSV. This guide walks you through configuration and daily use step by step.
📈 Designed for batteries, advanced materials, rheology, EIS, DMA and any workflow where full curves matter more than a single summary value.
1
🎯Decide when to use curve vs. discrete data
2
🧩Configure a curve-ready Data Template
3
⬆️Upload curve CSVs directly from tasks
4
🔍Open the instant curve report & review
📘
What “curve data” means in Data Templates
Curve data extends classic (discrete) Data Templates with continuous measurements, stored as full x-y curves imported from CSV files.
Discrete data templates are best when each row is a single summarised result per sample.
Example: “Capacity at 1C”, “Viscosity at 25 °C”, “Gloss at 60° angle”.
Each sample or trial becomes one row with numeric or dropdown values.
Curve data is for full traces with many points per sample.
Example: charge/discharge curves, impedance vs. frequency, stress–strain curves, modulus vs. temperature.
You upload a CSV where each curve is a set of x and y values.
Albert stores the full curve and can show an instant report for that single CSV.

💡 As part of curve data support, discrete data entry is capped at 1,000 rows per block. If your workflow needs more, switch to curve data instead of squeezing everything into one giant discrete table.
🧭
Step-by-step: from template to instant curve report
Use the chips below to focus on a single step, or keep “All steps” selected to see the full flow.
📋 All steps 1️⃣ Decide when 2️⃣ Template setup 3️⃣ Upload CSV 4️⃣ View report
1️⃣
Step 1 – Decide when to use curve data
Use curve data when any of the following is true:
Each instrument run outputs many rows per sample (e.g. time, frequency, strain).
The shape of the curve matters (e.g. plateau, knee, hysteresis), not just one value.
You frequently hit or exceed the 1,000-row limit for discrete data per block.
You want to click a single CSV and see an instant plot with the correct axes.
📈Think: “one file = one curve (or set of curves)”
🧪Best for batteries & advanced materials
2️⃣
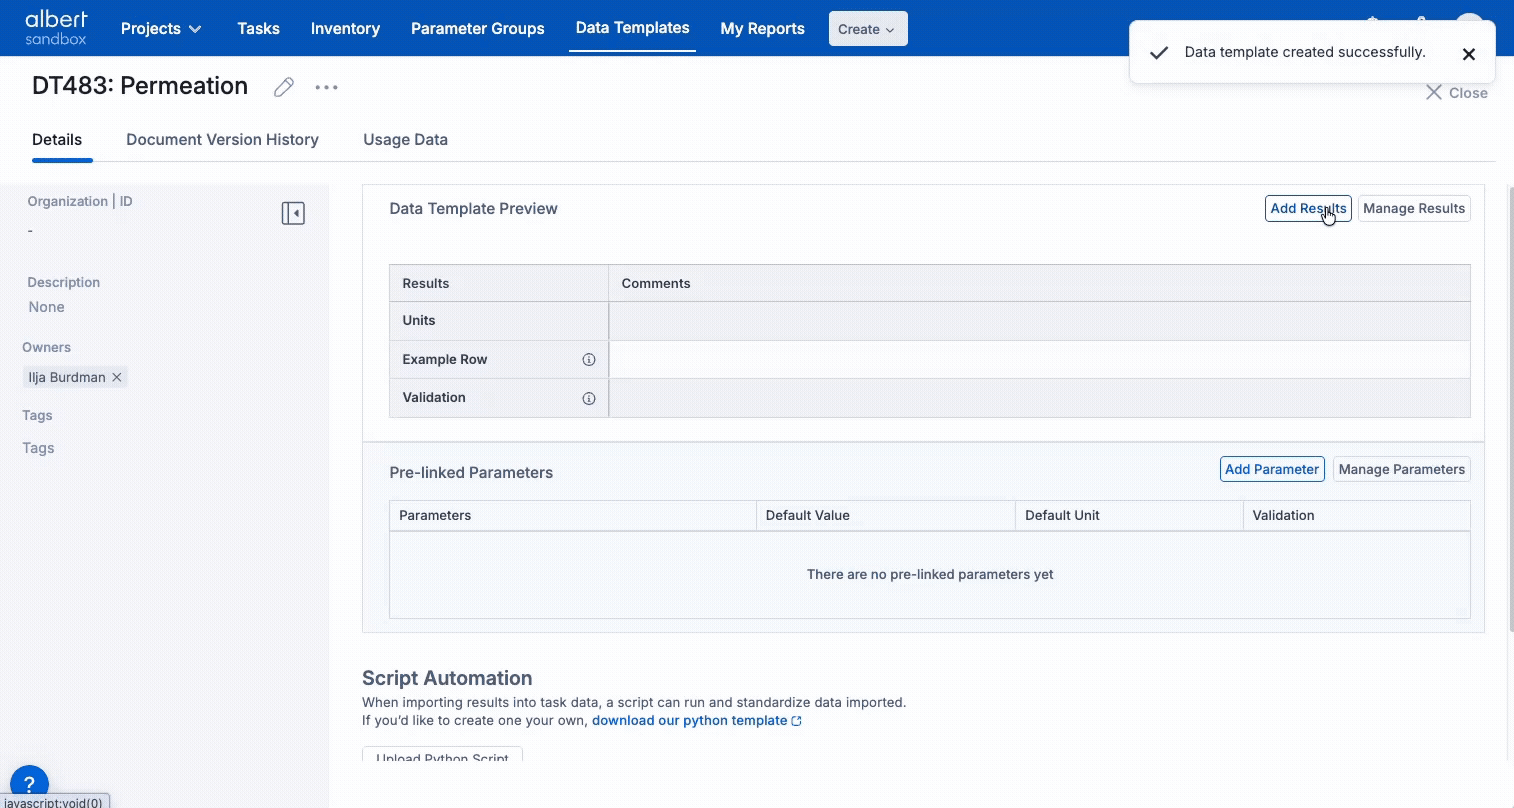
Step 2 – Configure a curve-ready Data Template
As an Albert Administrator / Champion:
Open or create the Data Template you want to use for curves.
Add a result for the curve, for example:
Charge/Discharge CurveorEIS Curve.Change its data type to the dedicated curve data type (continuous measurements).
In the curve configuration panel, pick:
X-axis column (e.g. Time (s), Frequency (Hz), Strain).
Y-axis column (e.g. Voltage (V), |Z| (Ω), Stress (MPa)).
Optionally, a grouping/series column if each file contains multiple curves.
The template is saved automatically. Any Property Task using this template will now accept curve CSV uploads into that result.
📐 Choose axis columns that match the headers in your instrument CSVs. That way, users can upload files without manual reformatting.
3️⃣
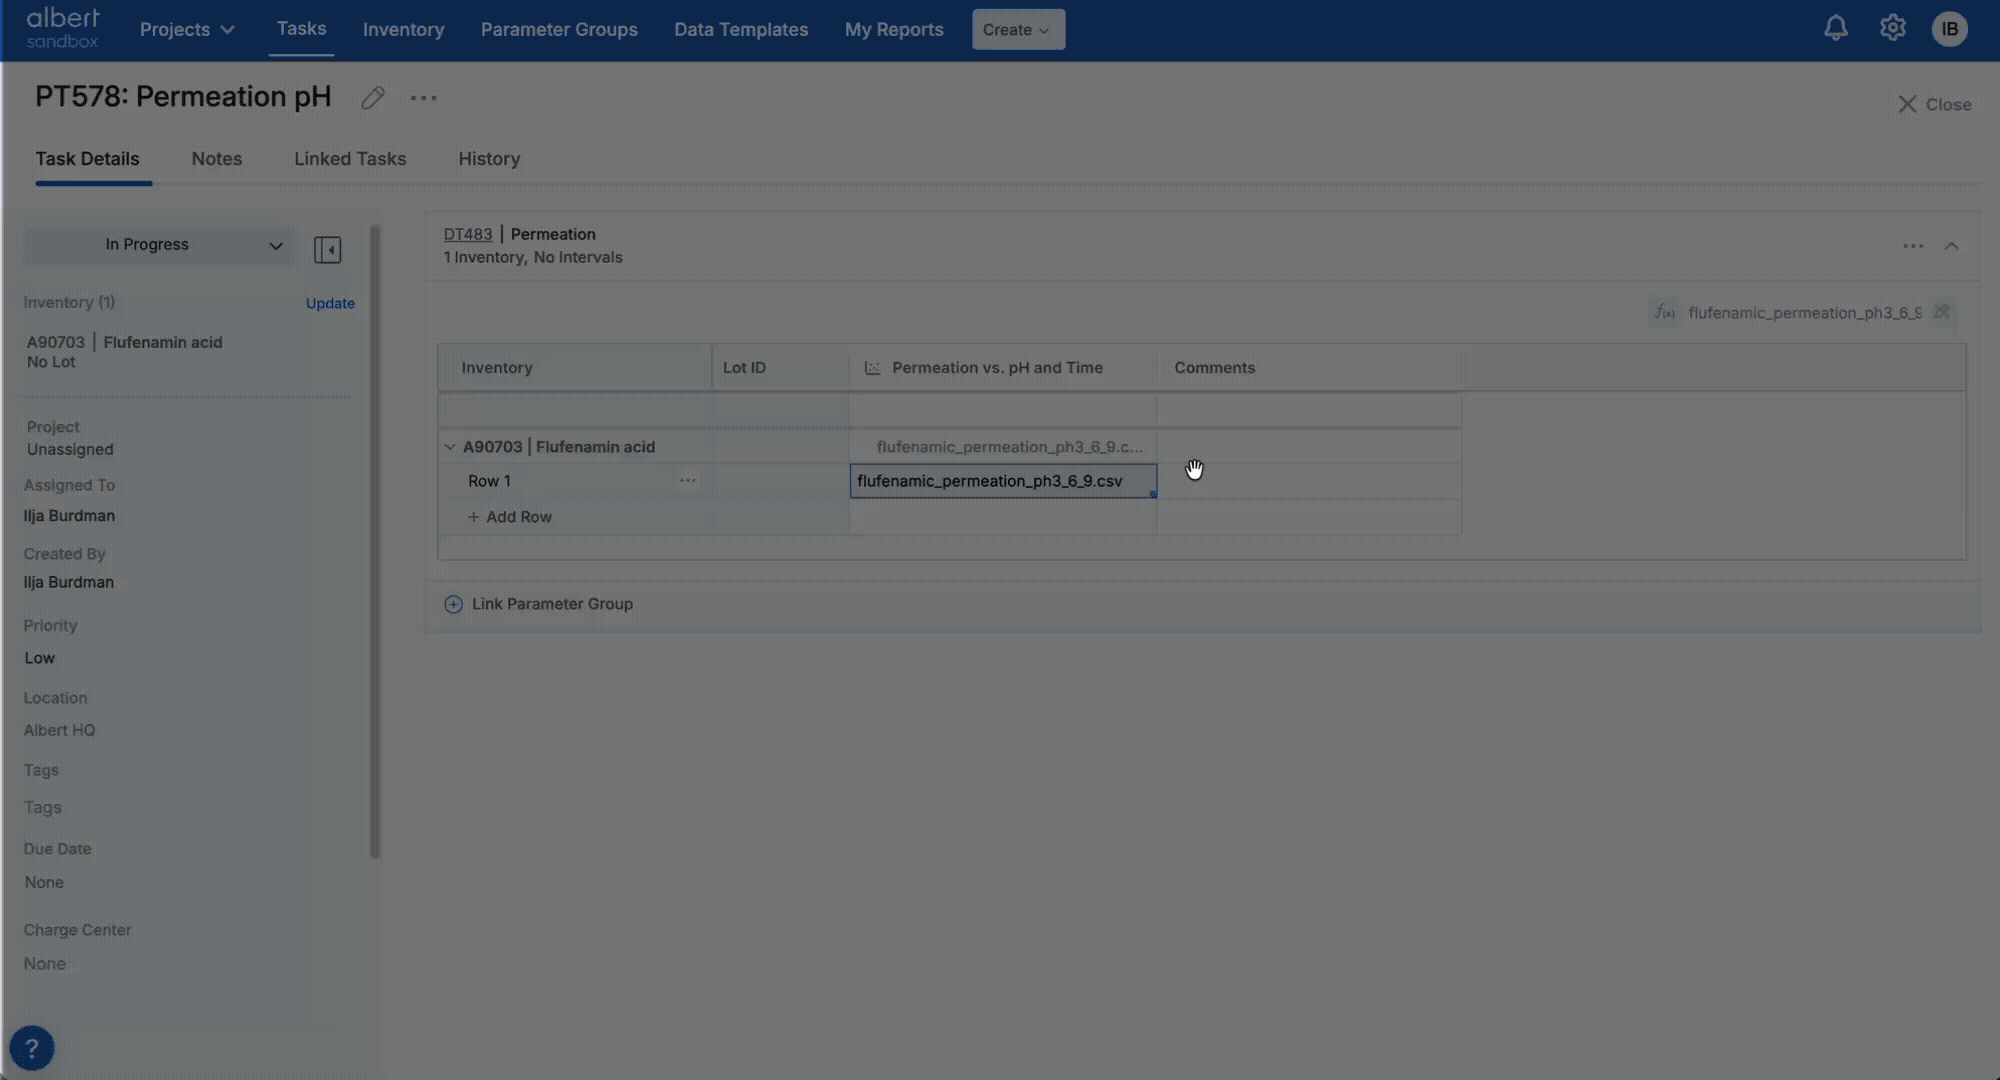
Step 3 – Upload curve CSV from a Property Task
For end users working in tasks:
Create or open a Property Task that uses the curve-enabled Data Template.
In the Results area, locate the curve result (e.g. “Charge/Discharge Curve”).
Click the Upload button next to that result.
Select the instrument’s CSV export from your computer.
Confirm that the preview looks correct (axes & series are mapped as expected), then save.

Behind the scenes, Albert attaches the full curve to the task – ready to be visualised or used by ETL scripts.
4️⃣
Step 4 – Open the instant curve report
Once a curve CSV is attached, you can open an instant report for that file:
From the task, click on the curve data file in the result cell.
Albert opens a dedicated curve report view, using the x- and y-axes configured in the Data Template.
Pan, zoom or hover points (depending on your configuration) to inspect the curve shape.
Close the report when you’re done – the curve remains stored with the task and is available for further processing.
🔍“One click → one curve report”
🧪Great for quick QA checks
🚫
Current limitations & behaviour
These limits are important when deciding how to structure templates and tasks that use curve data.
Discrete row cap: When curve data is enabled, discrete result entry in the same block is limited to 1,000 rows. For anything above that, move to curve data.
Overlays: Cross-sample and cross-task curve overlays are not yet supported in this first release. The instant report shows only curves from the selected CSV.
Calculations on continuous data: Curve data points are not yet available in template calculations (Function columns). They are stored and visualised but not used in formula fields.
❓
Curve data – quick FAQ
Short answers to the most common questions when teams adopt curve data for the first time.
👥
Who can configure curve data?
Creating and editing curve-ready Data Templates is normally limited to Albert Champions / Administrators. Once the template exists, any user who can edit tasks can upload supported curve CSVs into that result.
🧮
Can I still store summary results?
Yes. A single Data Template can combine curve results and discrete summary results (e.g. capacity at 1C, impedance at 1 kHz). Use curves for the raw trace and discrete results for key KPIs.
🤖
How does this work with ETL scripts?
ETL scripts can be attached to curve Data Templates just like any other template. Scripts can:
Clean and reshape instrument CSVs into the expected curve layout.
Fill discrete summary columns in the same task (e.g. “Initial capacity”, “Impedance at 1 kHz”).
Optionally split files into intervals or series if your method requires it.
For script development guidance, see the separate article on ETL Automation Scripts for Data Templates.