
Linking Data Templates to Inventory Items and Result Data
Attach structured measurements to materials (and lots) so results are consistent, searchable, and reviewable directly on the Inventory Item page.
Overview
Use Data Templates to define exactly what you capture (e.g., viscosity, assay, units) and Property Data to write/read those values on an Inventory Item (including per‑lot values).
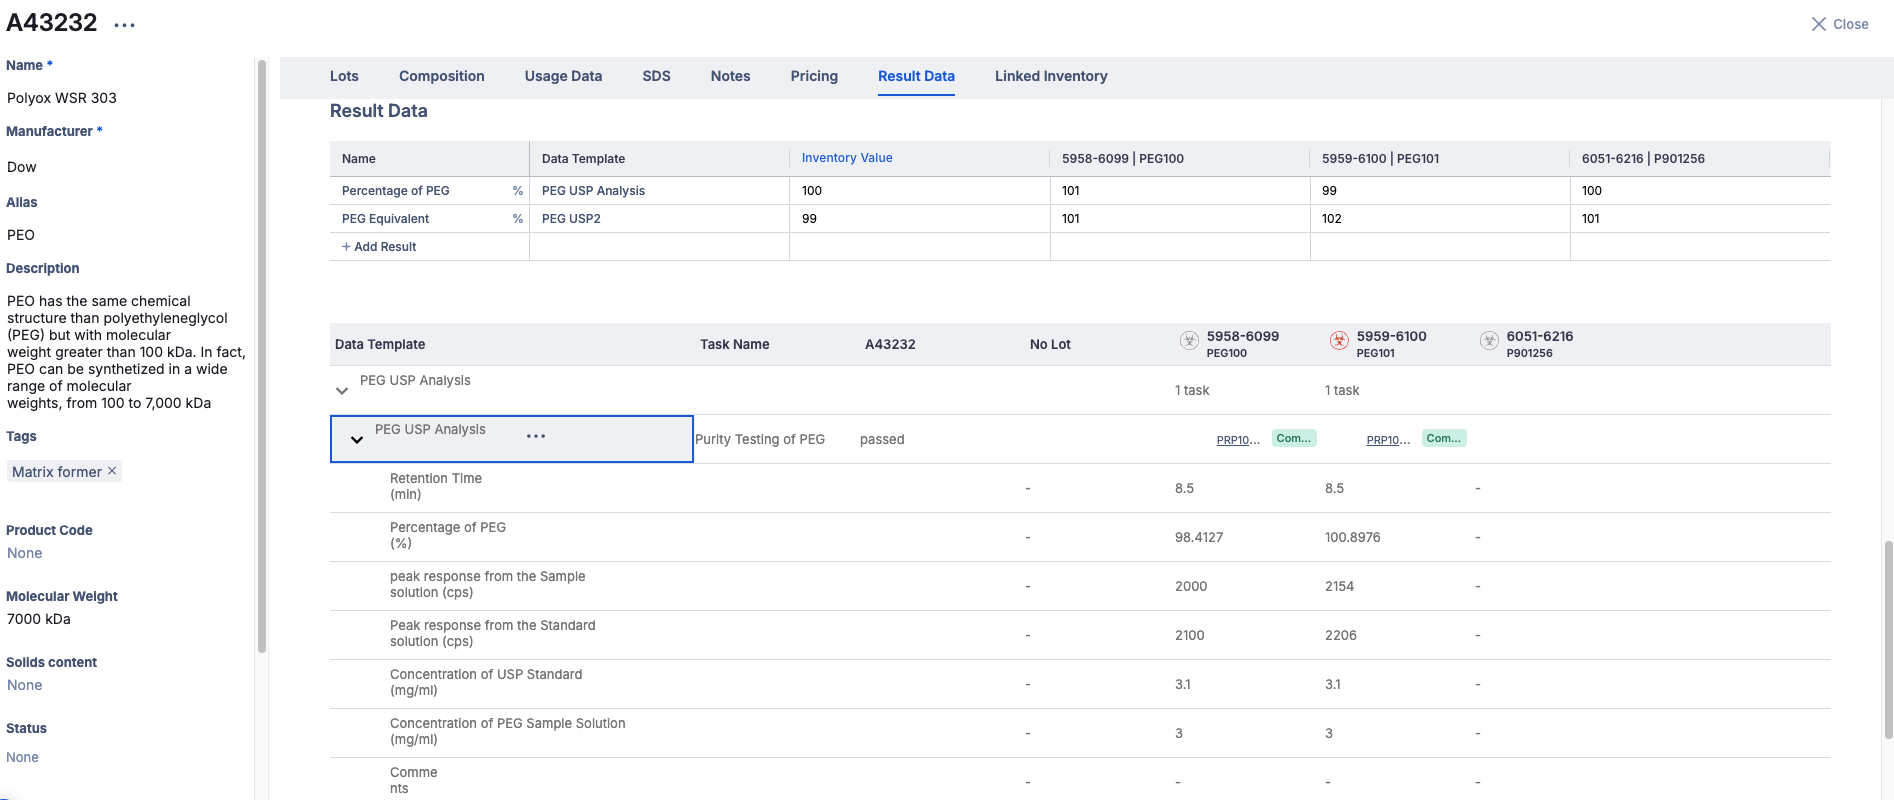
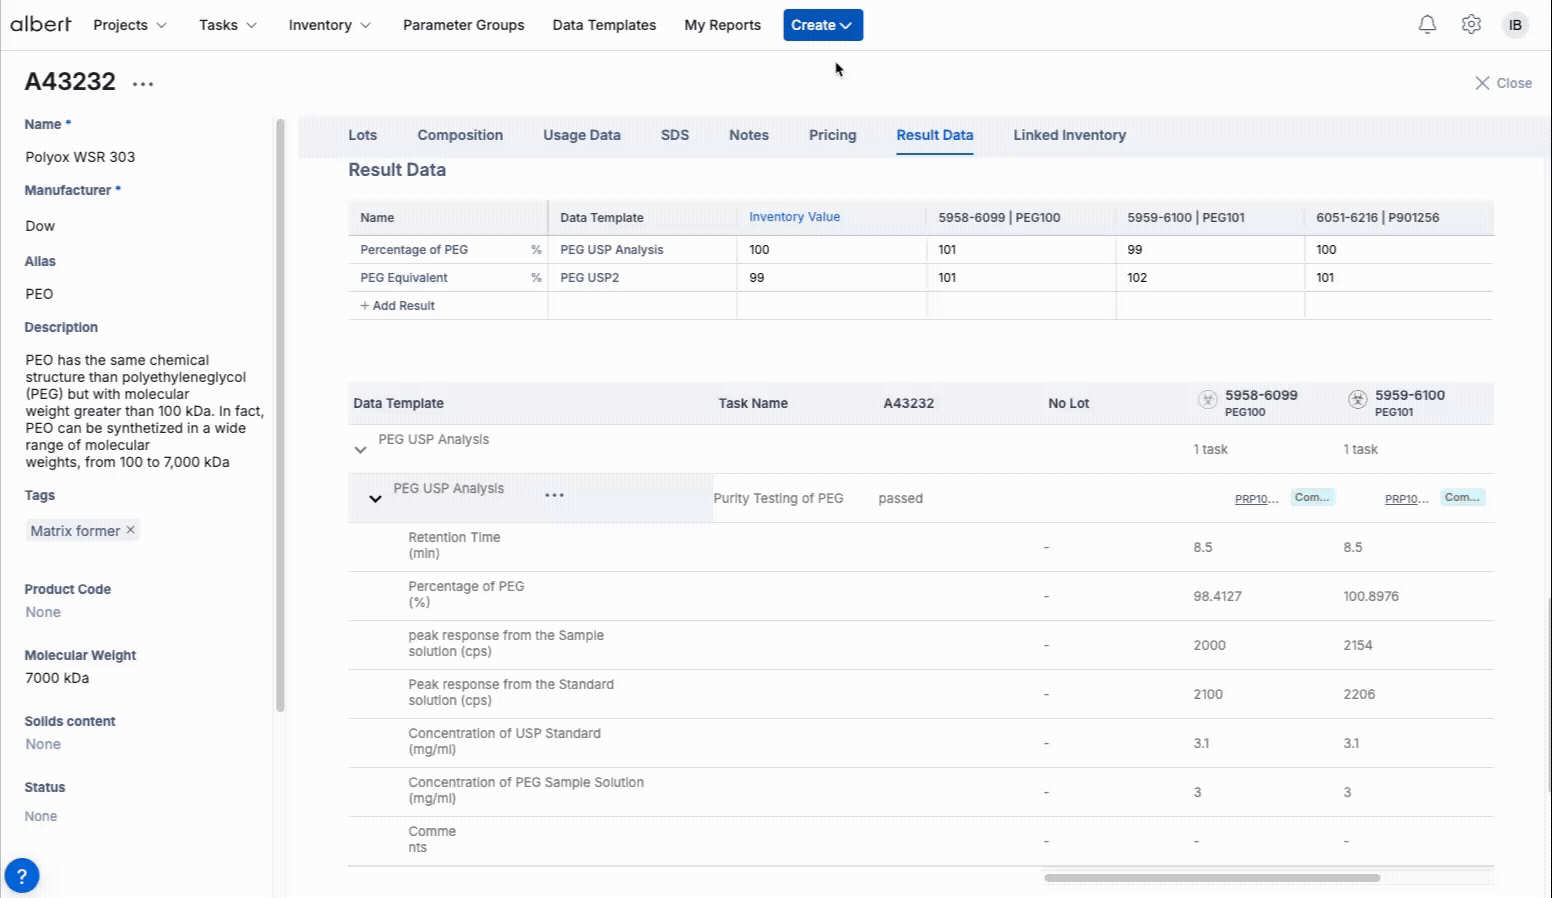
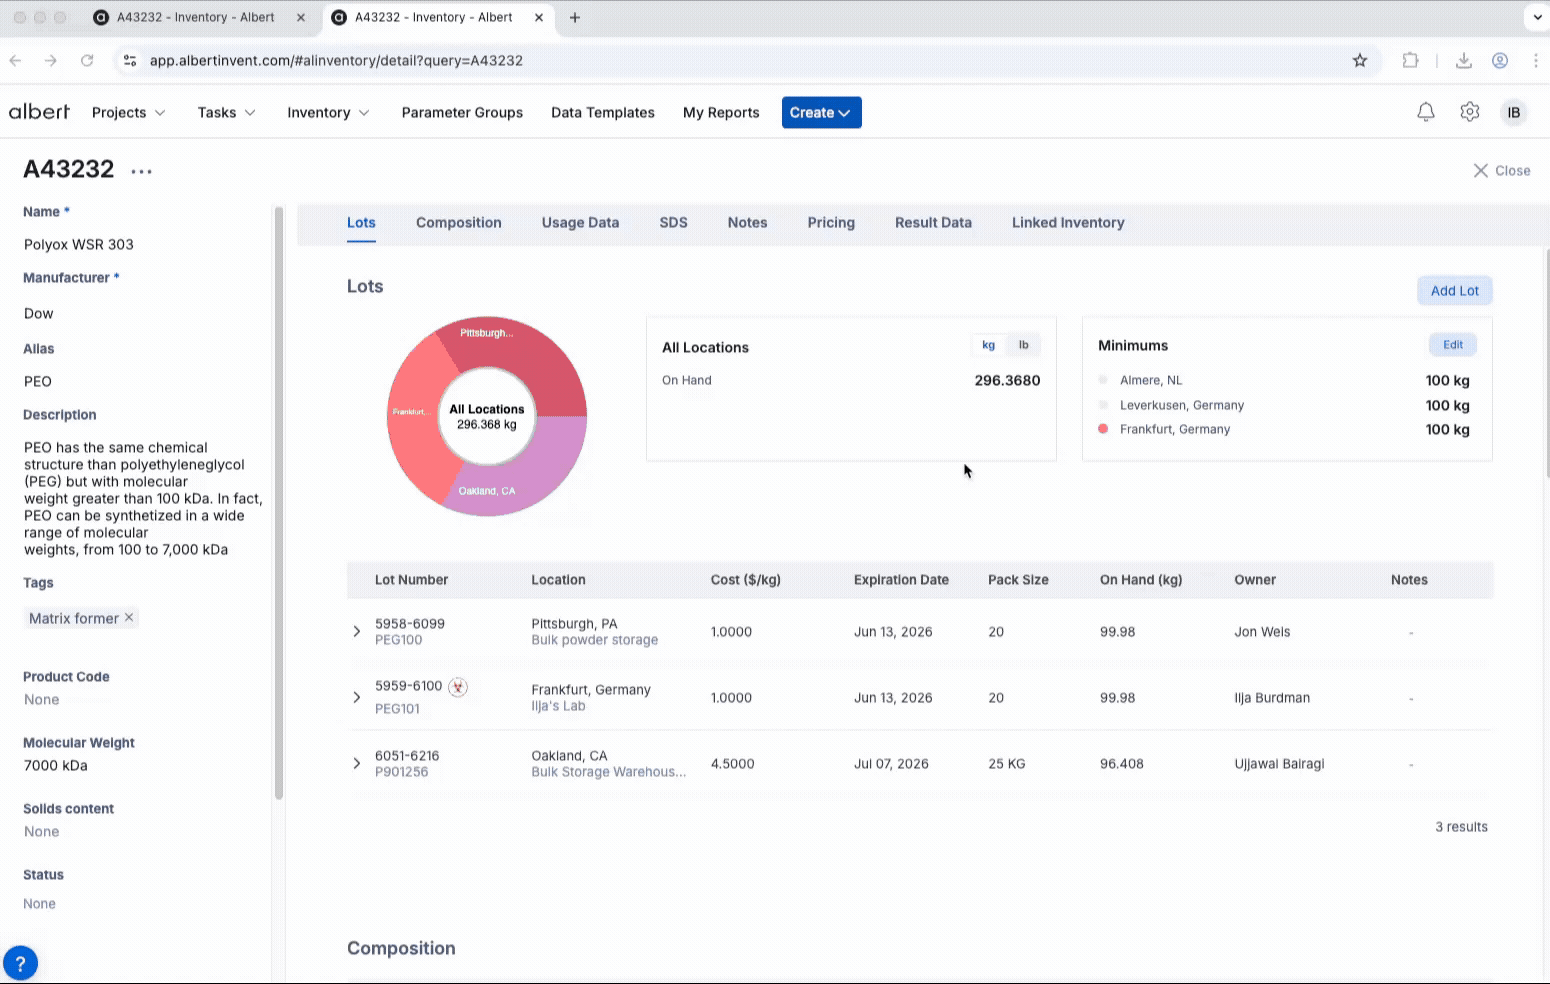
In this guide, we’ll link a template to an item—your raw material Polyox WSR 303—so new measurements appear in its Result Data table, organized under the template name and visible across lots and the generic item record.

Prerequisites
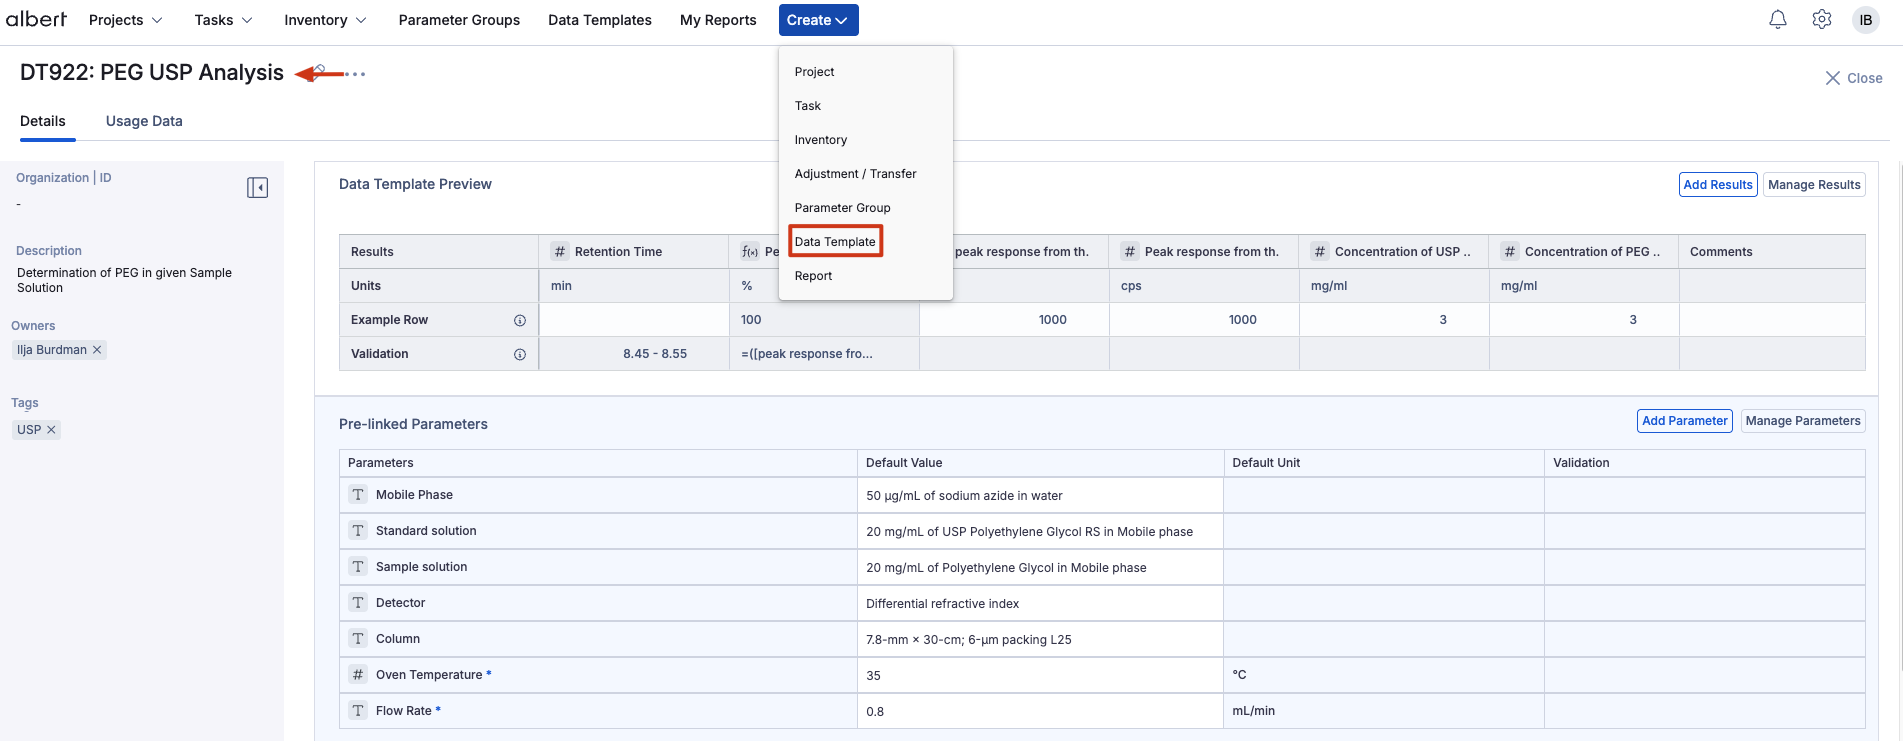
A Data Template with the fields you need (e.g., viscosity, assay, units).
The Inventory Item exists (and the Lot, if relevant).
You have permissions to create and edit Property Tasks.
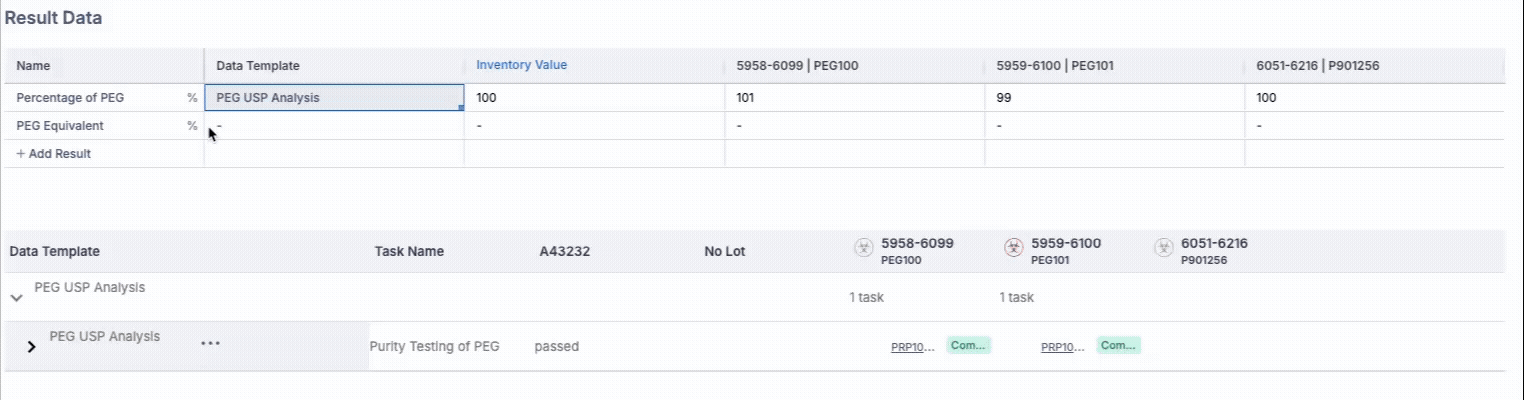
Result Data section
Review measured properties grouped by template and mapped across lots and the generic Inventory value.
Open the Inventory Item (e.g., Polyox WSR 303).
Go to Result Data.
Use + Add Result to record a new measurement.

Why use "+ Add Result"? It enforces the predefined template so values stay consistent across batches/lots.
Add a Result
Capture a measurement with units and a clear row name in one streamlined form.
Click + Add Result.
Enter the Value, select the Unit, and provide a Row Name (e.g., "Viscosity @25°C").
Click Create to add the row to Result Data.

Organize by Data Template
Assign a corresponding Data Template so results roll up correctly and remain comparable.
After adding a result row, choose a Data Template that already contains that result field.
Complete any required values defined by the template.
Save to lock in the structure (parameters, units, translations).
Need a refresher on templates? See 🧩 Data Templates.
Show results via Property Task
To surface values under an item’s Result Data, capture them in a Property Task that targets the item/lot and uses your Data Template fields.
Create a Property Task and ensure it targets the correct Inventory Item (and Lot, if applicable).
Attach the Data Template to the task so the form displays its measurement fields.
Enter measurements and Save. Those properties will now surface in the item’s Result Data table.
Procedure
Find or create the Data Template that matches your measurements.
Create a new Property Task with a clear name (include item/lot or test type).
Link the Inventory Item (and Lot, if applicable) to the task.
Attach the Data Template so its fields appear for data entry.
Enter measurement values and Save.
Open the Inventory Item → Result Data to confirm template‑named row(s) with lot columns.
Troubleshooting
Use this table to quickly diagnose and resolve common issues with results showing on Inventory Items.
Issue | Likely cause | Quick fix |
|---|---|---|
Results not showing in Result Data | Values were not captured via a Property Task, or the task wasn't linked to the correct Data Template. |
|
Results linked to the wrong lot | The task was associated with an incorrect lot. |
|
Fields don’t match what you need | Your Data Template is missing required parameters/columns. |
|
Units inconsistent or incorrect | Measurements entered without standardized unit fields. |
|
Can’t add results | Insufficient permissions to create or edit Property Tasks. |
|
FAQ
Quick answers about results capture, lots, and templates.
Do I need a Data Template to add results?
Yes—templates standardize fields and units so results are comparable across lots and time.
Can I record both item‑level and lot‑level values?
Yes. Property Tasks tied to a specific lot create lot‑level values; tasks without a lot create generic item‑level values.
Where do edits show up?
Edits made in the Property Task or in the Result Data row are reflected in the item’s Result Data table and audit history.
Need help choosing fields or migrating legacy data? Contact support.